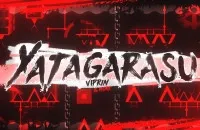
GD YATAGARASU: Conquering the Three-Headed Fury – A Strategy Guide
Geometry Dash Yatagarasu, affectionately known as “Yata,” is not just a level; it’s a monumental test of skill, reflexes, and perseverance within the Geometry Dash universe. As a mega-collaboration, Yatagarasu draws inspiration from the legendary three-legged crow of Japanese mythology and serves as a spiritual successor to infamous levels like Bloodbath and Cataclysm, pushing the boundaries of extreme demon difficulty. Rated at an unforgiving 10 stars, this level demands nothing short of perfection.
This guide will walk you through the treacherous segments of Yatagarasu, providing essential strategies and insights to help you navigate its relentless gauntlet and claim all three of its legendary coins. Prepare to hone your precision and push your limits.
Understanding the Basics: Control Your Icon
Before diving into the specifics of Yatagarasu’s formidable design, let’s quickly review the fundamental controls that are crucial for survival in any Geometry Dash level, especially one of this caliber:
- Jump: Press the left-click button, spacebar, or the up arrow key to initiate a jump. Precision here is paramount.
- Fly (Ship/UFO/Swing Copter): Hold down the key to ascend, and release to descend. Mastering the nuanced “taps” and hold durations is vital for tight spaces.
- Rings (Jump/Gravity): Press the key exactly when your character touches a jump or gravity ring. Timing is key for these critical assists.
- Pads (Jump/Gravity): Your icon will automatically jump or switch gravity when making contact with these. Be aware of their placement to anticipate your next move.
Now, let’s delve into the challenging segments of Yatagarasu.
Navigating the Gauntlet: A Segment-by-Segment Breakdown
Yatagarasu is a meticulously crafted nightmare, designed to challenge every aspect of your Geometry Dash prowess. Success hinges on muscle memory, adaptability, and unwavering focus.
0-10%: The Dark Ship Overture
The level commences with a daunting dark ship section. This segment is a claustrophobic maze of tight corridors, menacing spikes, and deceptive gravity portals. Flashing lights add to the disorientation, constantly testing your timing and precision.
- Strategy: Focus on immediate visual cues. Memorize the sequence of up and down taps required for each narrow passageway. Anticipate gravity shifts – listen for the sound cues and prepare your finger for immediate adjustment. Short, precise taps are often more effective than long presses in these constricted spaces.

11-20%: The Wave Weave
Transitioning into a formidable wave section, you must skillfully weave through a series of incredibly narrow gaps. Obstacles often appear unexpectedly, demanding instantaneous reactions.
- Strategy: This section is all about controlled, minute movements. Avoid large, sweeping adjustments. Instead, use light, rapid taps to make small changes in angle and height. Pattern recognition is crucial; spend time in practice mode to internalize the sequence of taps required for each gap. Quick reflexes are a must to dodge sudden hazards.
21-30%: UFO Precision Jump
The UFO segment demands absolute precision in your jumps and gravity shifts to avoid a relentless barrage of hazards. The path is extraordinarily narrow, requiring perfectly timed, almost identical taps against an intense, often distracting backdrop.
- Strategy: Every tap counts here. Memorize the exact rhythm and duration of each tap. Focus intently on your icon’s position relative to the upcoming obstacles. Small, consistent taps will allow you to maintain a steady altitude and navigate the tight spaces without colliding with the top or bottom boundaries.
31-40%: Ball Maze Mastery
The ball segment thrusts you into a complex maze of platforms and spikes, where rapid gravity shifts and direction changes are common. You must react swiftly, making split-second decisions to stay on course.
- Strategy: This section tests your quick decision-making and pattern recognition. Mentally map out the trajectory. Anticipate quick flips and prepare your finger to react. Sometimes, holding for a fraction of a second longer or releasing just as quickly can make the difference between survival and sudden demise.
41-50%: Swing Copter Contortion
The swing copter section tests your ability to maintain intricate control in exceedingly tight spaces, often with moving platforms and unpredictable gravity shifts. Precise timing and immediate adaptability are crucial.
- Strategy: Imagine your swing copter as a sensitive pendulum. Carefully timed, short taps are essential to negotiate the moving platforms and avoid impalement. Watch for the shifting gravity portals, as they’ll instantaneously reverse your flight momentum, requiring you to adjust your tapping rhythm on the spot.
51-70%: The Three-Headed Boss Fight
This dramatic segment pits you directly against Yatagarasu itself in an intense boss fight. You will need to expertly dodge projectiles and counterattacks while skillfully navigating incredibly complex patterns against an escalating background that intensifies the challenge.
- Strategy: This is less about pure reflex and more about pattern memorization and composure under pressure. Identify the boss’s attack patterns (e.g., projectile sequences, laser sweeps). While dodging, remember the environment; the arena itself is part of the challenge. Maintain focus on your icon more than the detailed effects. Keep pushing forward!
71-80%: Memory Lane
This section is a pure test of your memory, requiring you to recall intricate obstacle patterns and timing. Hidden traps and sudden direction changes are strategically placed to amplify the difficulty and punish any lapse in concentration.
- Strategy: Practice, practice, practice. This is the segment where brute-force memorization through repeated attempts genuinely pays off. Pay close attention to subtle visual cues. Some pathways might seem open but are in fact death traps; others require precise movements through “invisible” gates. Trust your learned sequence.
81-90%: Mini-Ship Agility
In the mini-ship segment, you’ll pilot a small ship through incredibly narrow gaps. The reduced size of your icon, while seemingly beneficial, actually heightens the challenge by demanding even finer motor control and blistering fast reflexes.
- Strategy: Think “micro-adjustments.” The responsiveness of the mini-ship means that even the slightest over-tap or under-tap can lead to a collision. Approach this section with controlled, gentle taps, focusing on threading the needle through the tightest of spaces. Anticipate the next gap immediately after clearing the current one.
91-100%: The Final Gauntlet
The final ship sequence accelerates dramatically, requiring you to dodge a barrade of obstacles at incredibly high velocity. The fast-paced action and escalating music combine to push you to your absolute limits as you strive for the finish line.
- Strategy: Stay calm, even as the intensity reaches its peak. This is where your accumulated muscle memory from the entire level culminates. Trust your instincts and rely on the hundreds, if not thousands, of practice attempts. Maintain a focused gaze slightly ahead of your icon to anticipate upcoming obstacles. Don’t let the music or visuals distract you from the final, critical movements. Perseverance is rewarded here.
Conclusion: Embrace the Challenge
Conquering Yatagarasu is a monumental achievement in Geometry Dash. It demands not just skill, but an unparalleled level of dedication and mental fortitude. Each segment presents its own unique set of challenges, requiring different strategies and a mastery of the core controls. Approach each section systematically, practice relentlessly, and never give up. The feeling of finally overcoming this three-headed fury is an exhilarating reward that few players ever get to experience. Good luck, and may your taps be precise!